Gallery 32 - Plymouth to Wembury
The Devon Coast between Plymouth and Wembury

Royal William Victualling Yard - Basin

Mayflower Marina - Mount Wise

Royal William Victualling Yard

Tidal Pool - Firestone Bay

West Hoe Pier

Seafront 1

Seafront 2

Smeaton's Tower - 1

Smeaton's Tower - 2

Tinside Lido

The Leviathan

South West Coast Path Sign

St Christopher Medallion Sculpture

South West Coast Path Marker

Radford Castle

Wreck

Hexton Quay

Rail

Marina

Cattewater

Plymouth Hoe.

The Citadel

Mountbatten Tower

Smeaton Tower / Memorial

Mount Batten Breakwater

Drake's Island

Mount Batten Ferry

Jennycliff Bay

Batten Bay

Batten Bay

Mount Batten

Views

Drake's Island - 2

Bovisand Casemates - 1

Bovisand Fort Casemates - 2

Bovisand Bay

Bovisand Beach

Crownhill Bay - 1
Crownhill Bay - 2

Picklecombe Fort

Plymouth Breakwater

Bovisand Fort 1

Bovisand Fort 2

Andurn Point

Bovisand Fort 3

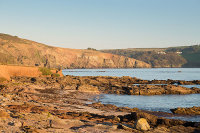
Westlake Bay

Heybrook Bay - 1

Great Mewstone

Heybrook Bay - 2
Head Deposits

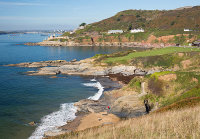
Wembury Bay

Wembury Point
