Gallery 39 - Exmouth to Sidmouth
The Devon Coast between Exmouth and Sidmouth

River Exe

Starcross Ferry

The Esplanade

Jubilee Clock Tower

Exmouth Beach

Orcombe Rocks

Rodney Point

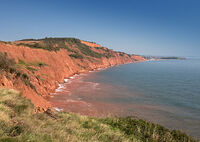
Red Sandstones Cliffs
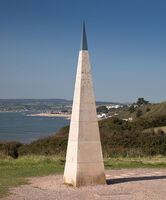
The Geoneedle

Straight Point

Orcombe Point -1

Orcombe Point - 2

Boulders

Straight Point - 1

Straight Point - 2

Sandy Bay

Cliffs
Littleham Cove

Budleigh Salterton

Straight Point / Littleham Cove

Littleham - Radioactive Nodules

Budleigh Salterton Pebble Bed

Honeycombe Weathered Otter Sandstone

Beach Huts

Fishing Boats

Budleigh Salterton Beach

Otter Estuary

Otter Point

Otter Estuary Nature Reserve

Shingle Spit

River Otter

Otterton Point - 1

Danger Point

Black Head

Otterton Point - 2

Brandy Head

Smallstones Point

Black Head

High Peak

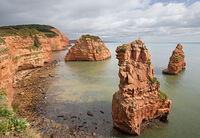
Ladram Bay - 1

Big Picket Rock

Ladram Bay Stacks

George The Third Rock

Hern Rock
Hern Point Rock

Ladram Bay - 2

Sidmouth
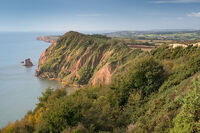
High Peak - 1

Peak Hill - 1

High Peak - 2

Peak Hill - 2

