Gallery 31 - Portwrinkle to Cremyll
The Cornish Coast between Portwrinkle and Cremyll

Portwrinkle Harbour - 1

Portwrinkle Harbour - 2

Portwrinkle

Tregantle Fort / Beach

Sharrow / Grotto Beach

Sharrow Grotto

Freathy Beach

Rame Head

Whitsand Beach

Western Gear

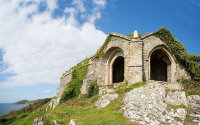
Rame Head Chapel

Penlee Point

Rame Head

Eastern Gear

Rame Head - 1

Rame Head - 2
Queen Adelaide's Seat

Penlee Point

Cawsand Beach

Cawsand Square

Boundary Marker

Kingsand Beach

Kingsand Clock Tower

Old Pilchard Cellars

Kingsand Foreshore

Sandways Beach Huts

Picklecombe Fort

Plymouth Breakwater / Fort

Fort Picklecombe - 1

View

Gothic Barracks

Fort Picklecombe - 2

Lady Emma's Cottage

Folly

Drake's Island

Plymouth

Garden Battery

Cremyll Ferry

